Streaming or casting Oculus Quest headset to other screens
If you’re showing off your Oculus Quest and taking turns with friends it’s great to be able to watch what the player is seeing. Streaming or Casting the Oculus Quest can let you demonstrate virtual reality apps and games for others. It’s also really helpful when introducing people to VR.
Here are two ways to mirror your Oculus Quest on another screen.
Casting
UPDATE: You can now easily Cast Oculus Quest to your PC in a browser.
Oculus Quest, being an Android based device, has a mirroring option built in—It uses Google Cast technology. This lets you view on your mobile device via the Oculus app, or cast to Google Cast enabled devices like Google Home Hub, Chromecast, Chromecast Ultra, and NVidia Shield.
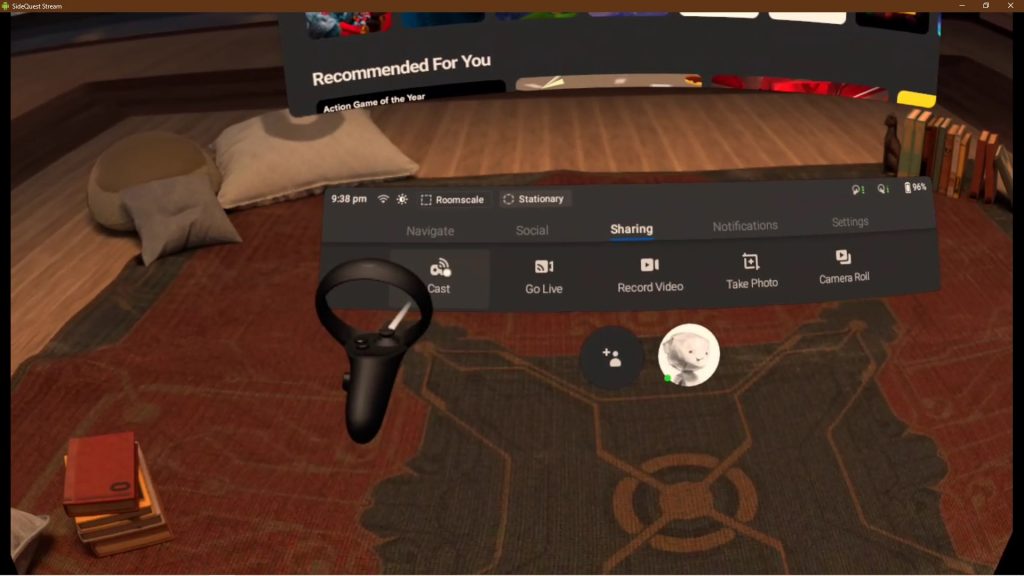
In the Oculus menu choose the “Sharing” tab, and select “Cast” icon—which looks something like this:

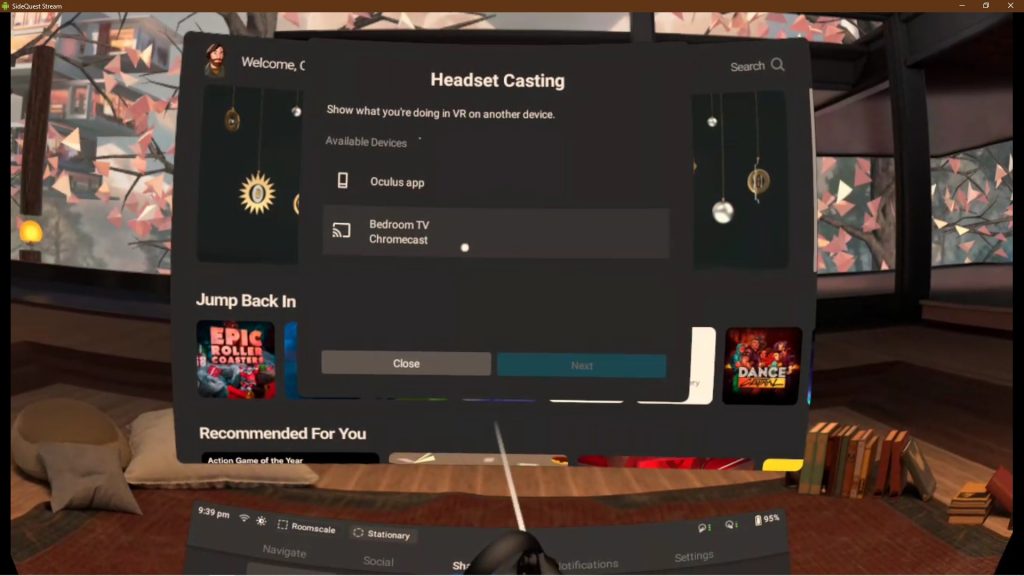
A window will pop up showing available devices. Choose the device you want to watch on and click “Next.”

Notes:
- To use Casting, your Oculus Quest headset and the device you want to cast to need to be on the same wireless network.
- Casting is not available in all apps.
- Open the Oculus app on mobile before trying to cast to it—when you start casting it will pop up a window asking for approval.
Stream to PC Using ScrCpy included in Sidequest
This solution uses the open source ScrCpy—built into SideQuest—to stream the display from your Oculus Quest headset to your PC, allowing others to see what you see while you play. Setup is pretty easy, and only takes a few clicks to start streaming after you enable developer mode and install SideQuest (prerequisite).
First, make sure your headset is connected to SideQuest. You can do this via USB or over WiFi if you have set that up previously.
After you’ve connected, to start the stream click the “Stream from your Headset to your PC with ScrCpy” icon in the top bar.

Choose your options and click Start Stream
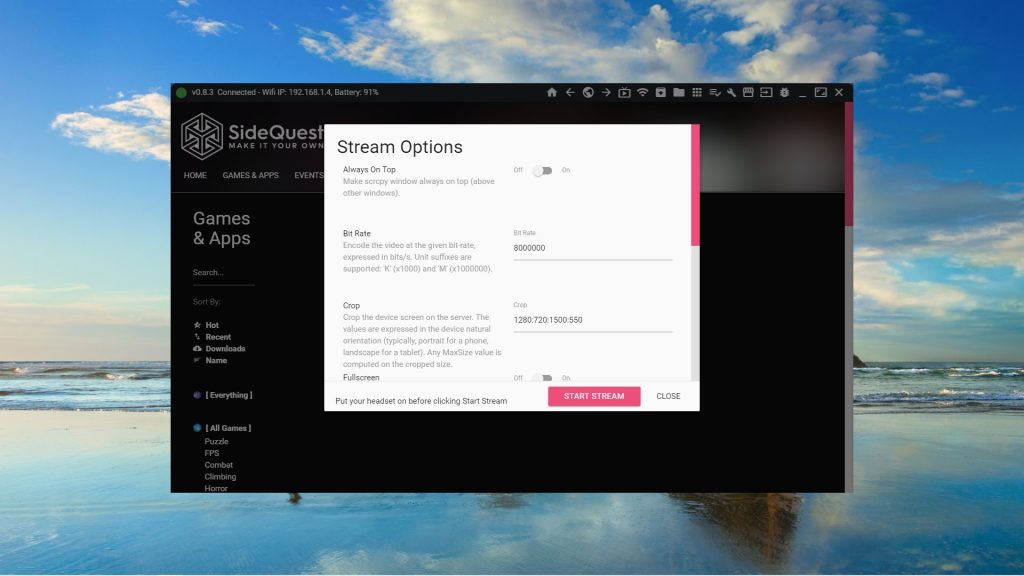
A new window titled “SideQuest Stream” will open, mirroring the view from your headset.

Recording and Streaming With OBS
Download the free Open Broadcaster Software (OBS Studio) from https://obsproject.com/
Install and open the program.
Setup OBS for Recording
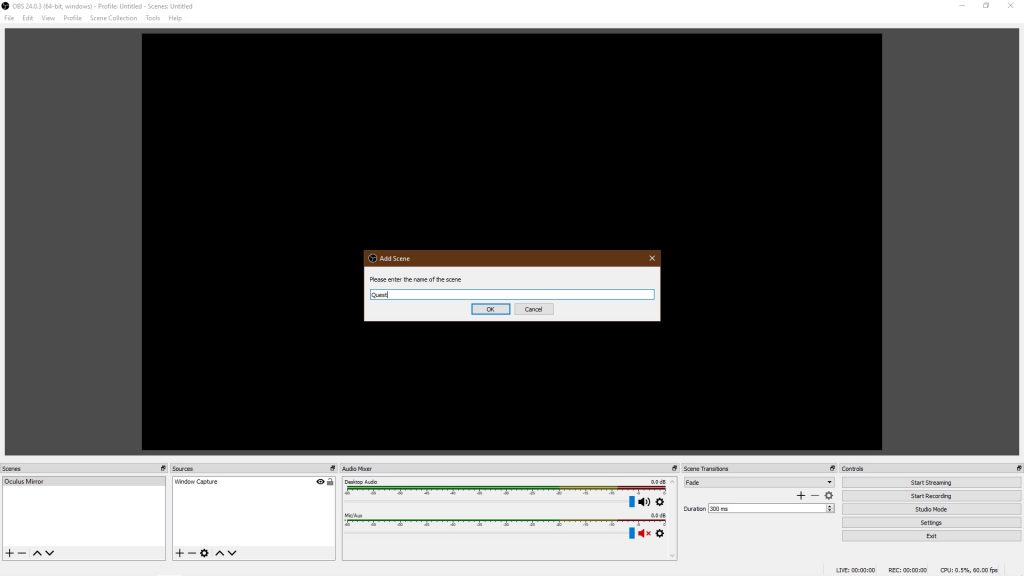
Create a new scene.

Give the Scene a name. I’ll call mine “Quest.”
Add a source.

For the source type choose “Window Capture.”

Give the source a name, I’ve called mine “sidequest.”
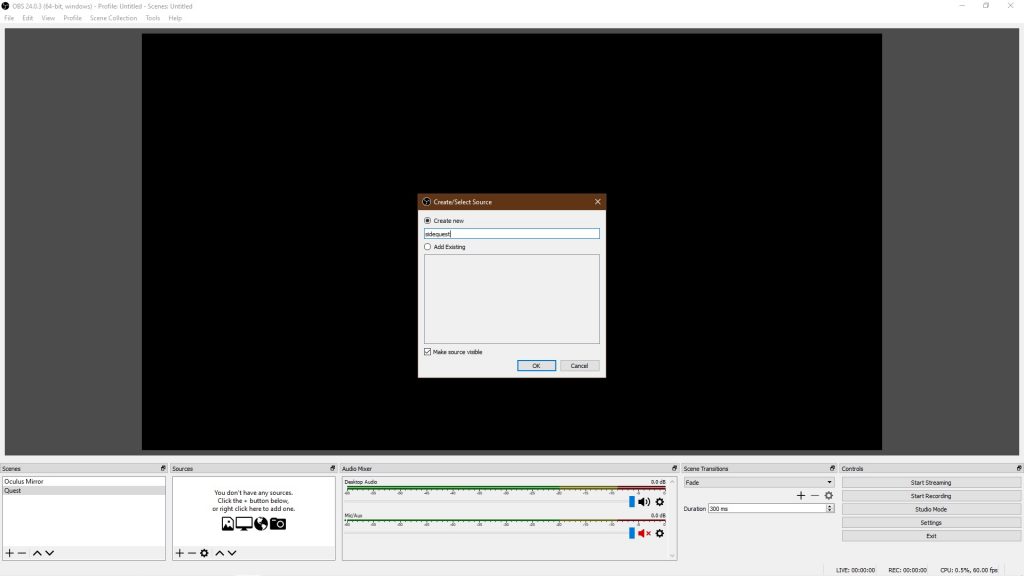
Select the window “[scrcpy.exe]: SideQuest Stream.”
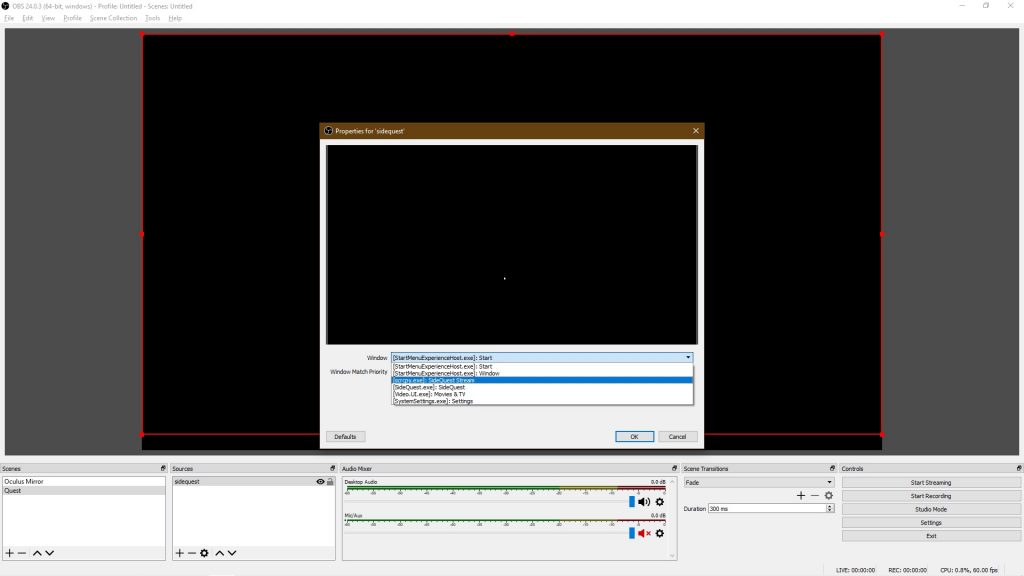
Make sure you are already streaming to PC with SideQuest before adding source if you have trouble finding the window
Note: The next step would be to choose audio inputs, but the ScrCpy streaming method doesn’t send audio. You’ll need to come up with another method to add sound from the Quest, as I haven’t managed to yet. You can choose to add a source from other input devices or windows on your PC.
Record or Stream
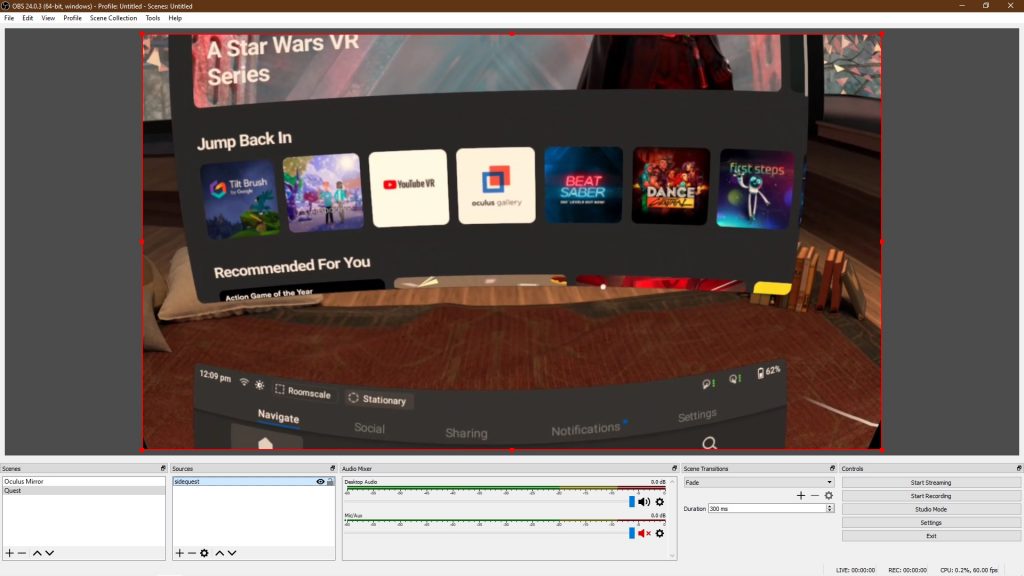
You should now see the preview in the OBS window, and be able to start recording or streaming by clicking the buttons on the right side of the screen.
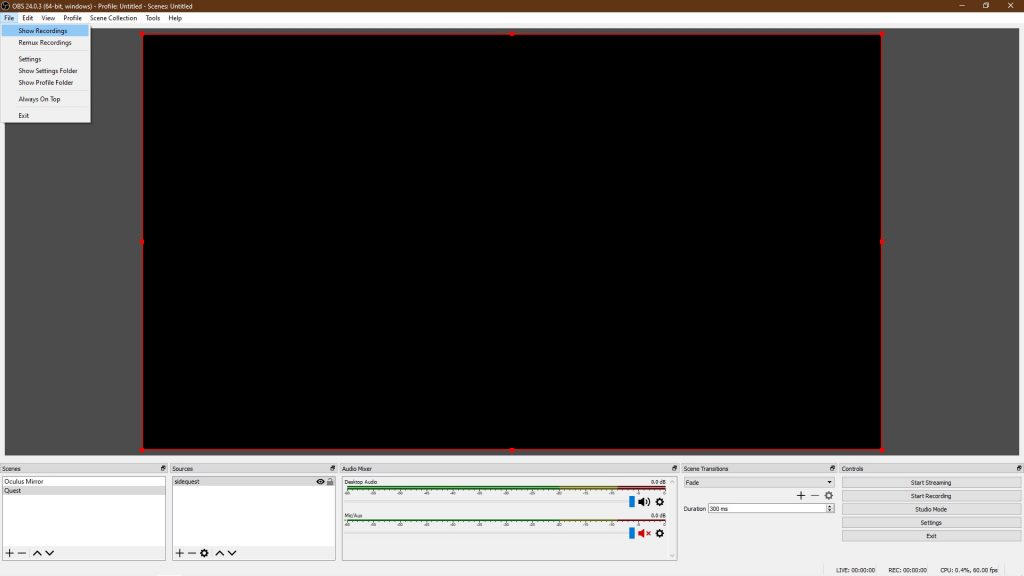
Once you’re all done recording and ready to find those your video files to upload or edit, in OBS Studio click on “File” in the top menu bar, and then click “Show Recordings.”

Leave a Reply