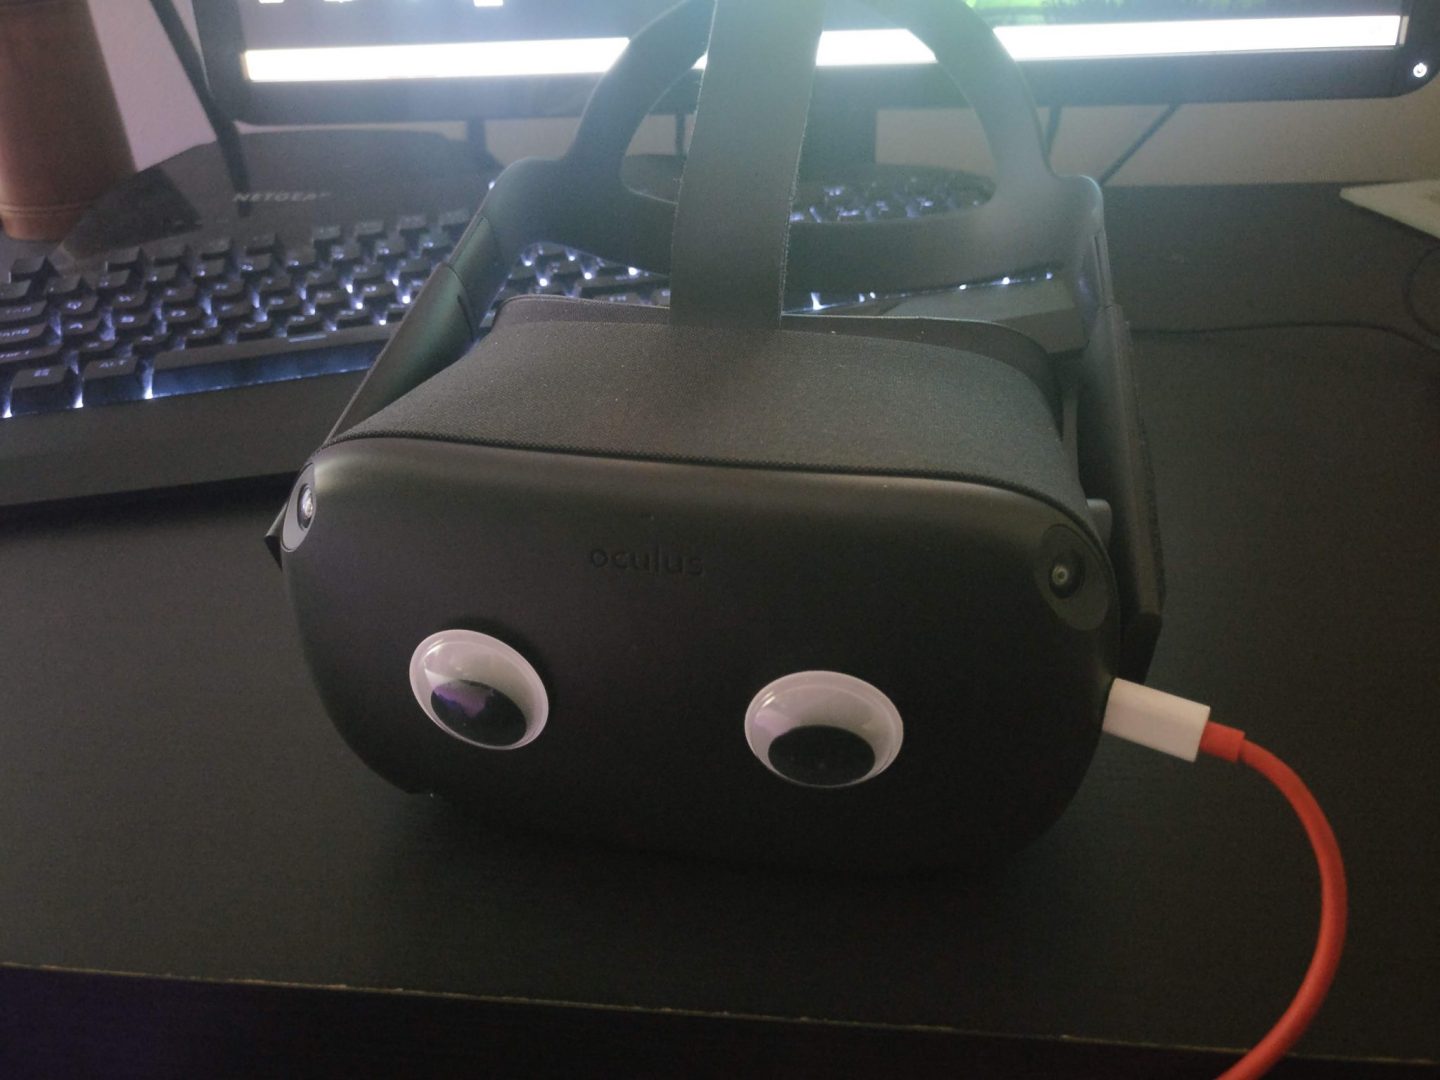
Setting Up Oculus Quest for Side-loading
To unlock the full potential of your Oculus Quest headset, you need to enable developer mode and side-loading. Side-loading is just transferring files between two devices—in this case, your PC and Oculus Quest. You’ll be able to add apps and games from sources other than the Oculus Store, open up streaming options, and the ability to play some PC VR games on the Oculus Quest without having to use a wire or Oculus Link.
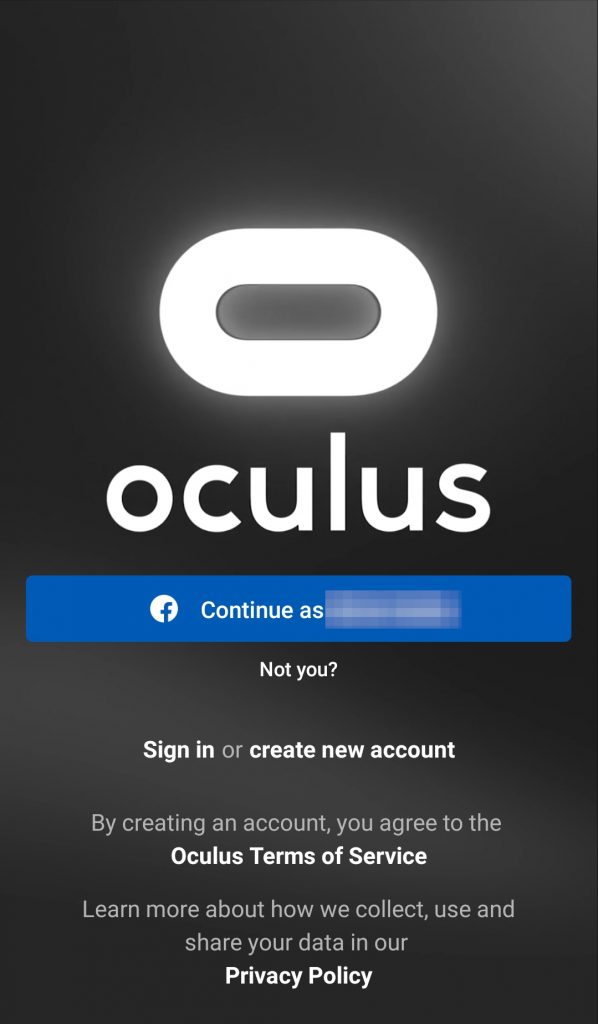
Get started in the Oculus App for your mobile device.
Install the Oculus app on your mobile device from Apple Store or Google Play
Open the app and sign in with your Facebook Account, or create a new Facebook account to use for Oculus (it’s required for social features and party options in some games).
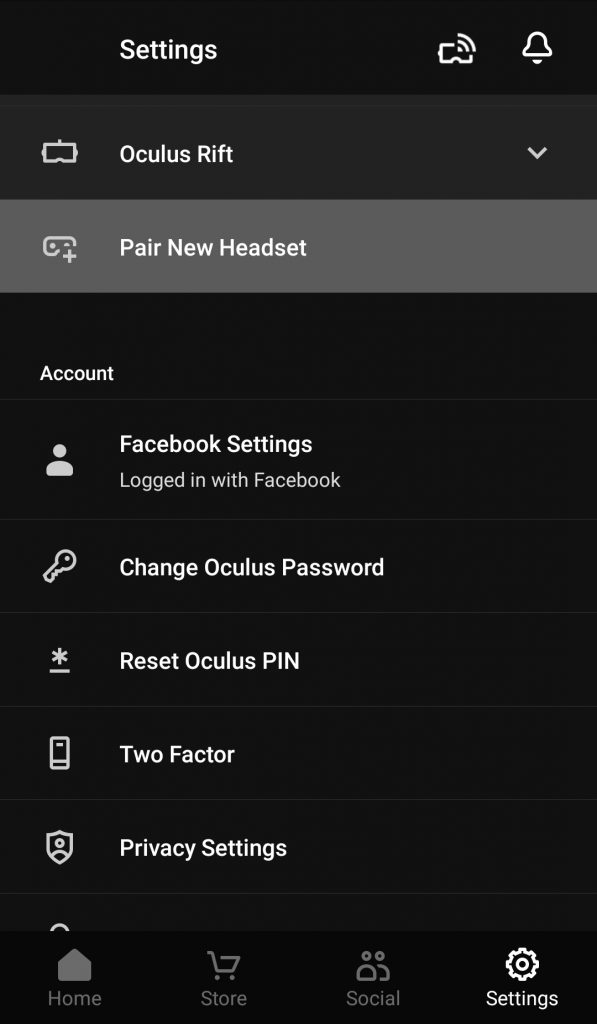
Add your Oculus Quest headset and start Pairing while on a WiFi network
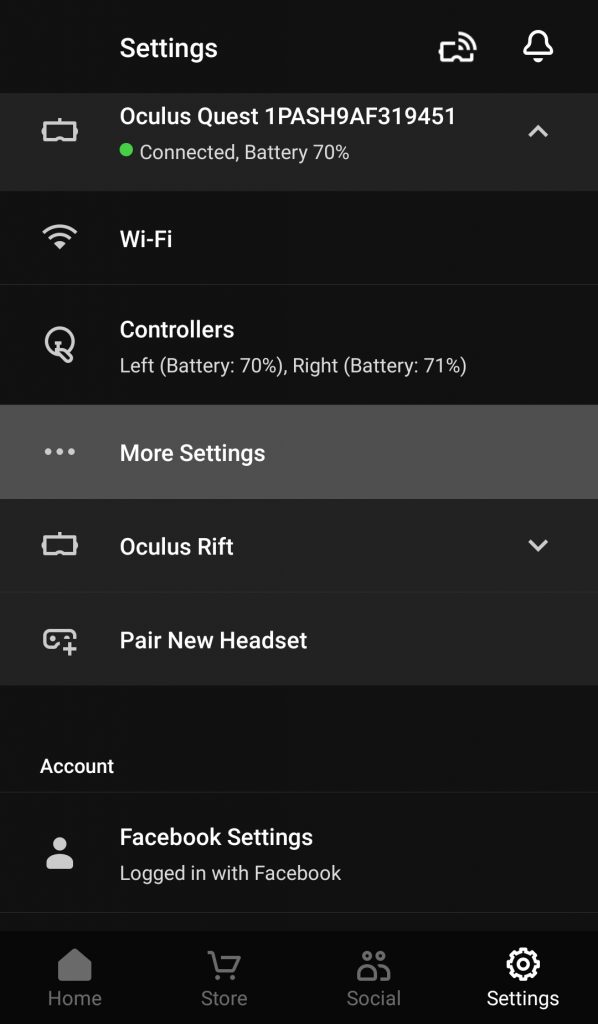
- Choose “Settings” in the bottom bar of the Oculus app
- tap on “Pair New Device”
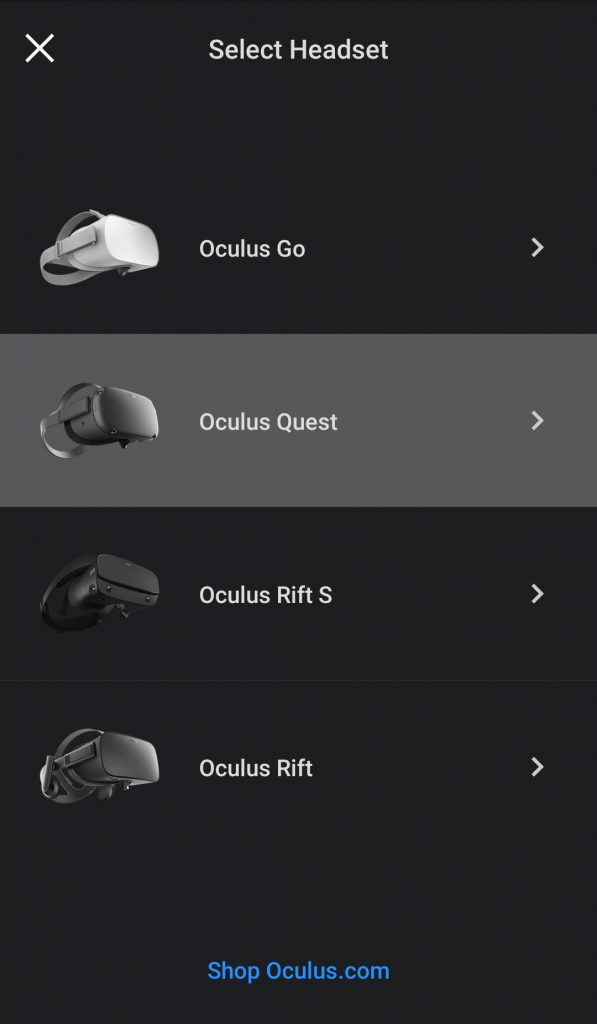
- choose “Oculus Quest”
Become a developer
To gain access to sideloading and altering files on the Quest you’ll first need to enable developer mode. This will allow Side Loading apps and other features.
Sign up as a developer at by registering an account on the Oculus Developer Dashboard via this link.
Choose anything you want for company name–I used the title of my blog and Facebook page, TechTipsVR. After you’ve registered continue in the Oculus app on your mobile device.
Activate Developer Mode on Quest using the Oculus App on Mobile
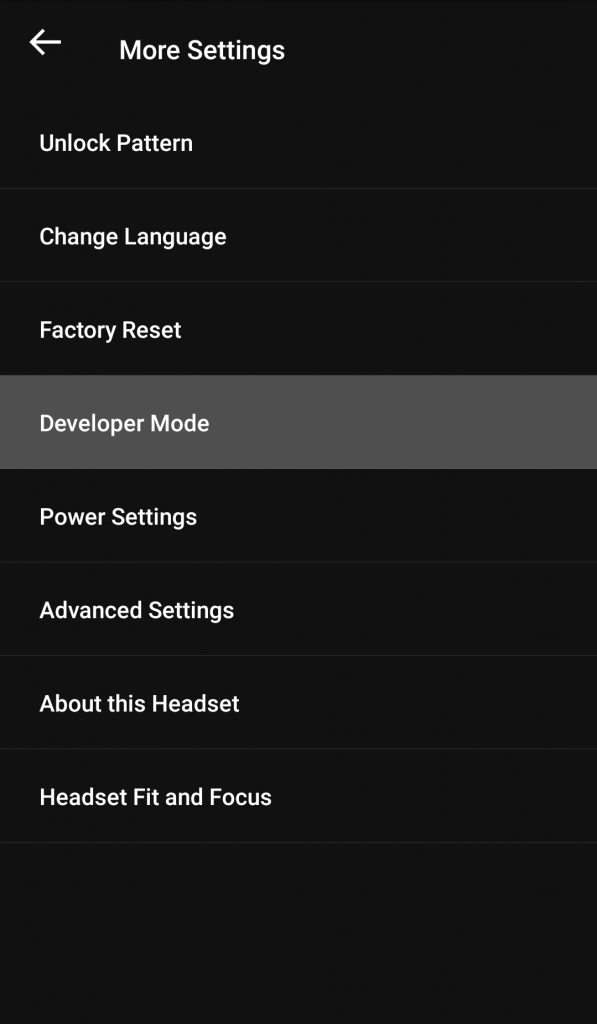
- In the “Settings” menu tap on “More Settings”
- Tap “Developer Mode”
- Tap or make sure the toggle to enable Developer Mode has been activated
- Reboot the Oculus Quest

Connecting the Quest to your PC
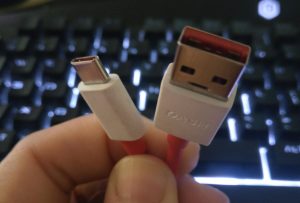
Connect the Quest to your PC with a USB cable. My computer doesn’t have a USB C port, so I had to use another cable. Luckily, the cable for my phone (OnePlus 3T) is USB C on one end and USB A on the other. I even managed to plug the USB A in correctly on the first try. =)
You’ll also need to download and install the ADB drivers for Oculus from Oculus ADB Drivers | Developer Center | Oculus.
- Equipment Needed: USB C port, or USB type C to type A cable.
If you don’t have a USB C port or a USB type A to type C cable, these Aceyoon cables on Amazon have right angle, L shape like the Oculus Quest charging cable. (Amazon Affiliate links) US: https://amzn.to/360Mwe4 UK: https://amzn.to/2MtNesS
If you plan to use Oculus Link, then perhaps this 3 meter Anker cable (Amazon Affiliate link) that was recommended by Oculus before they released their own High Speed Fiber Optic cable.
Installing and Using SideQuest
SideQuest is the application that lets you side-load apps and games to the Oculus Quest. It’s also basically an alternate store for VR games.
Download and install the latest version of SideQuest from sidequestvr.com or https://github.com/the-expanse/SideQuest/releases
I’m on a Windows PC, but Mac and Linux versions are also available. Download the correct file for your operating system and run it. It will take you through the install process and launch SideQuest on your PC.
Disable the “Unlock Pattern” on the Quest (if you have one set).
In the Oculus Mobile App: Settings > Quest > More Settings > Unlock Pattern
Launch SideQuest (if it is not already open) and plug your headset into the PC.
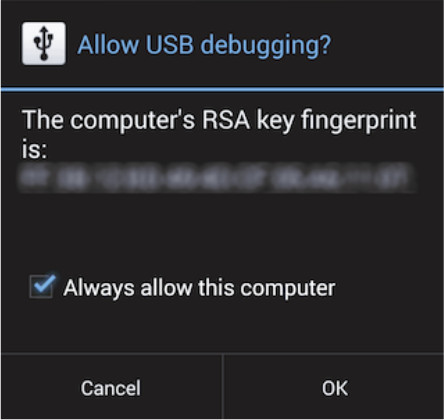
Allow USB Debugging—Once connected you will need to allow debugging by approving a popup in the Oculus Quest Headset. Make sure to check the box to “Always allow from this computer.”
if everything is working you’ll see a green dot in the top left corner, along with the device’s IP address and battery level.

Install Apps in SideQuest
As long as your Quest is connected, via either usb or wifi (see below), you’re all set to begin installing apps. You’ll know it’s ready because of the green dot in the top left corner. Browse or search games in SideQuest, then just click on the “INSTALL LATEST” button, or “GET ON ITCH.”

More games and apps from other sources.
More games and apps can be side-loaded from APK files downloaded to your PC from other sources. You might find some things on github, or if you are developing your own apps you can push them to the Quest.
In the top bar, click “Install APK file from folder.” (The icon is the down arrow in the box.)

An explorer window will open, letting you browse your computer for files to manually send to the Quest.
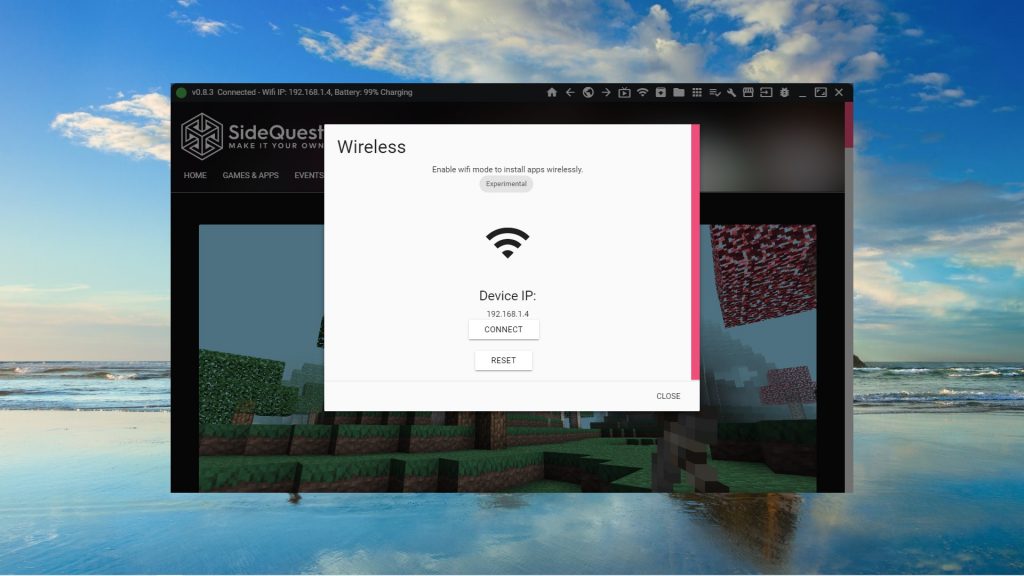
Enable Wireless mode (experimental feature).
After Developer options are enabled, and SideQuest is installed and working, you can switch to ADB over WiFi and continue to use all the awesome features of SideQuest without the USB cord. Click the WiFi icon to “Enable Wireless mode. (Experimental).“

A popup window will show you the Device IP, and allow to connect.
If you’ve previously connected with WiFi, then you may be able to reconnect by sending the ADB command.
Click “Run ADB commands,” and then click “Connect to WiFi ADB.”

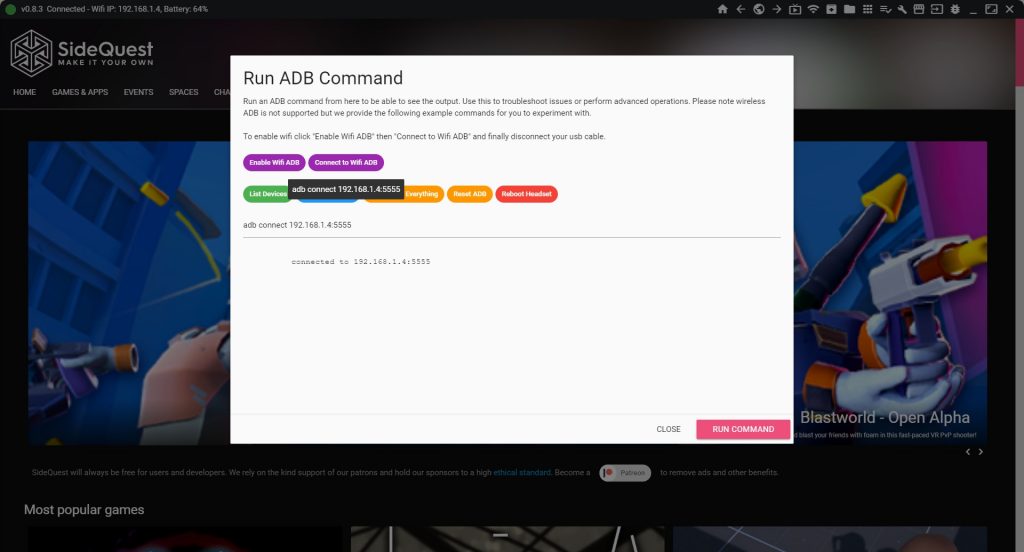
Reconnecting to Wireless ADB doesn’t always work for me, especially if I’ve rebooted the headset, but it is after all, still an experimental feature. The solution is to plug the USB cable in, and use “Enable Wireless Mode” again.
That’s all for this guide. You should be ready to begin installing games, apps, and mods on your Oculus Quest. Lots are available directly through SideQuest by browsing the “Games and Apps” tab or visit the website https://sidequestvr.com/.
More Oculus Quest Guides
How to Play Beat Saber Custom Songs on Oculus Quest
How to Stream Oculus Quest to TV or PC
How to Play Steam VR Games Wirelessly on Oculus Quest
4 responses to “Oculus Quest: Enabling Developer Mode and using SideQuest”
Hi, I’m doing this with a macbook Pro. Everything goes smoothly, but after I enable wifi disconnect the ‘cast’ button doesn’t appear. I’m connected wirelessly, but there’s no cast button… Any help will be appreciated.
Sorry I don’t have any mac products to test on, but when it’s working, you should see the top bar has a green dot and says “v0.8.3 (or latest v0.8.4) Conncected – WiFi IP: (whatever your ip address is), Battery: (whatever your battery percentage is).
Then, you can unplug the USB and click on the Streaming button the SideQuest top bar. Should look like: https://imgur.com/gallery/zJCNcDu
This post tells you how to install the things, the post specifically about casting is at https://techtipsvr.com/guides/how-to-stream-oculus-quest-to-tv-or-to-pc/
Hmm… wordpress won’t let me edit my comment. Anyways the other thing I wanted to say: Wear the Quest on top of your head like a hat while you try to initiate the stream. When the headset is on your head, a little sensor is blocked and it stays active and alive. You might not see the stream icon in sidequest if the headset goes into standby.
[…] aren’t familiar with installing apps using SideQuest check out my guide for setting it up: Oculus Quest: Enabling Developer Mode and using SideQuest—No longer necessary for Virtual […]