Steam VR Games on Oculus Quest
Want to play Steam VR games like Skyrim, No Man’s Sky, and Fallout 4 (FO4VR) on your wireless headset? By unlocking developer mode and enabling side-loading on your Oculus Quest, you can install an application that allows you to do just that.
Air Light VR (ALVR) is a free opensource app that lets you connect your Oculus Quest to your PC wirelessly. It creates a server between an app on the Quest and a desktop application on your PC.
There are other applications which can also get the task done. VRidge: Riftcat is not free, but allows for 5 minute demos to see if it’s worth paying for. There’s also Virtual Desktop (for Oculus Quest)—I bought the Oculus Rift version a while back, but rarely had reason to use it after Oculus and Steam VR made virtual desktops a feature of their own software. I’ve tried Riftcat, but found that ALVR had better latency for me, and since it was free it was the easy choice.
A couple of caveats, you’ll need to be connected to the same WiFi network that your PC is on to play games, and it is suggested to use a 5ghz connection for best latency. You’ll also need to have installed Steam, and Steam VR on your PC, and purchase your games through the steam store. Before you can install ALVR on your Quest you will need to enable developer mode and install SideQuest. After you’ve done that, go ahead with the rest of this post for a step-by-step rundown of how to set it up.
Download and install ALVR
Prerequisite—ALVR Requires The latest supported Visual C++ to run (Download and install from Microsoft’s support sitehttps://support.microsoft.com/en-us/help/2977003/the-latest-supported-visual-c-downloads .)
Download and install ALVR from https://github.com/JackD83/ALVR/releases. You’ll need to download both files.—Save to a new folder on your desktop for convenience.
- ALVR.zip
- ALVRClient-v2.4.0_experimental_v8.apk (or newer version if available)
ALVR Server Setup On PC
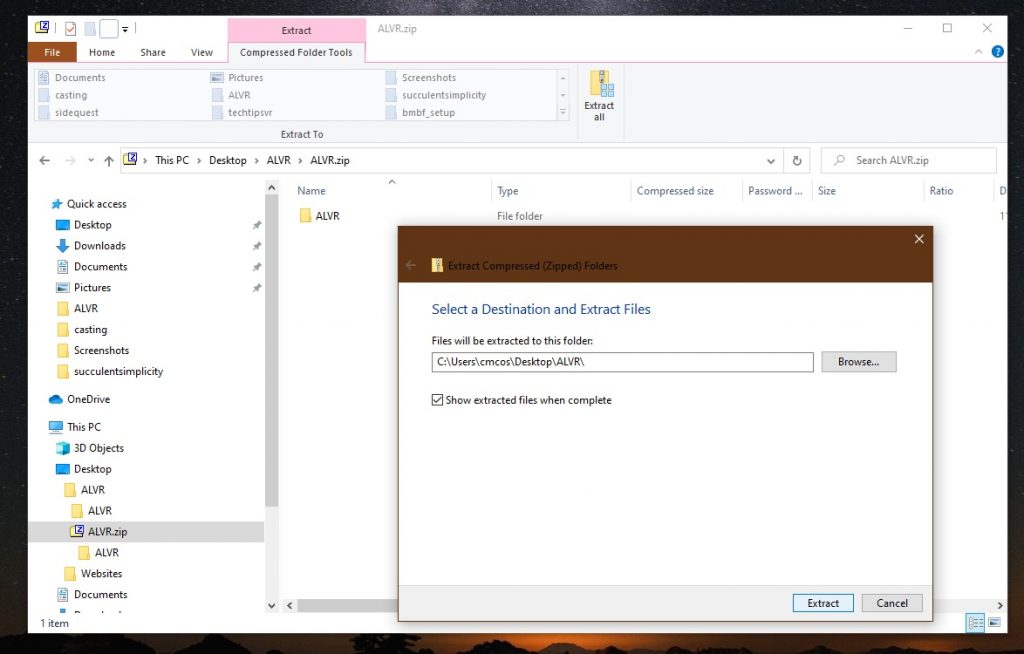
Extract ALVR.zip
Find the ALVR.zip you saved on your PC—For me its in folder called ALVR on my Desktop. Open it, and extract all the files. It will extract into another new folder named ALVR.
Add firewall rules for ALVR
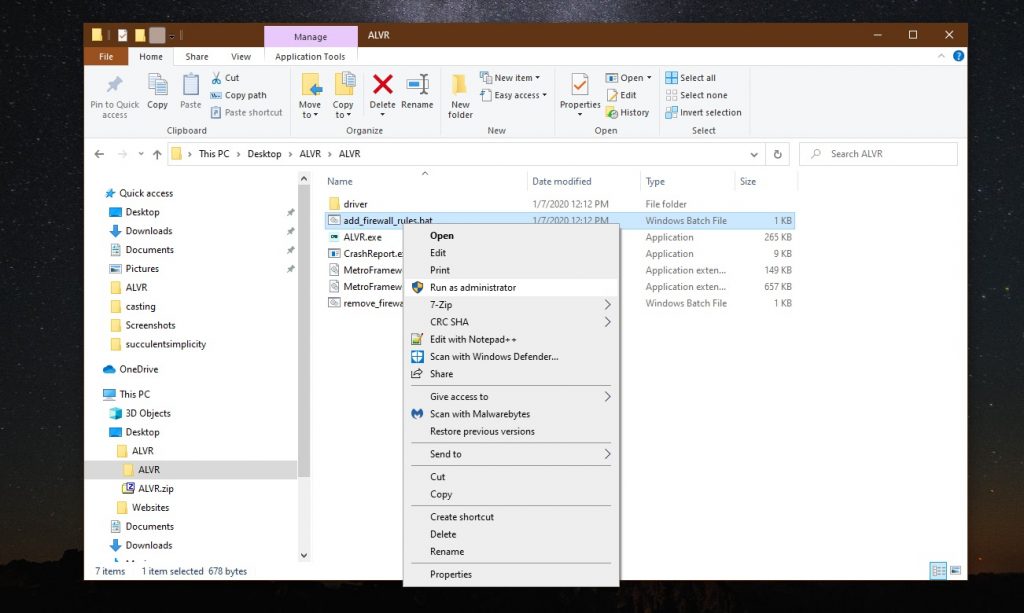
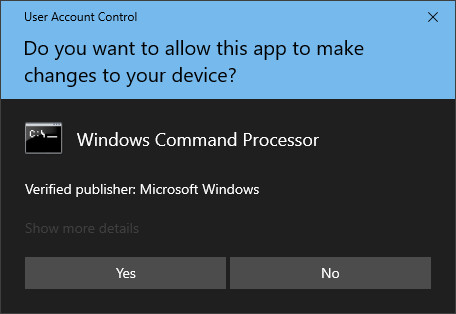
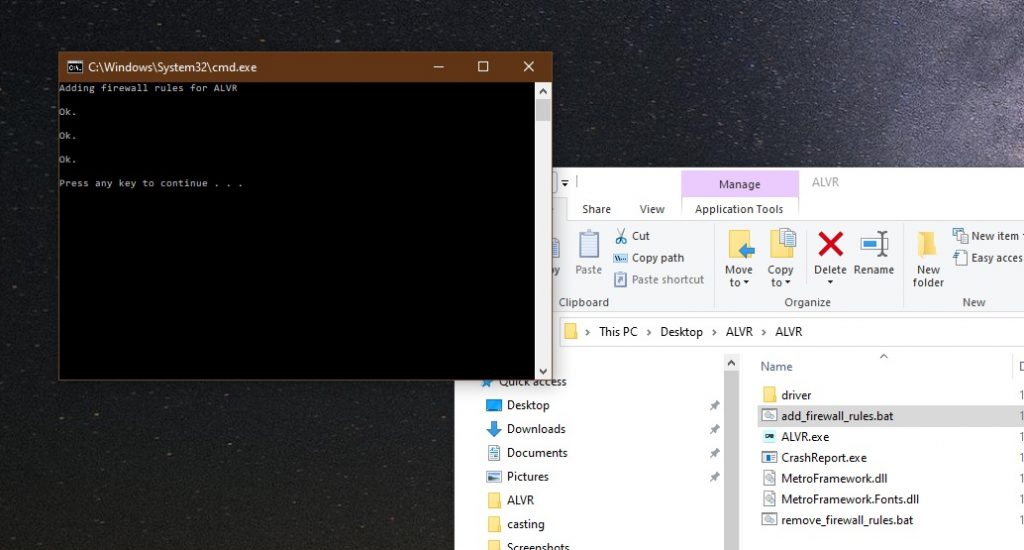
In the new ALVR folder where we just extracted, locate and right-click on add_firewall_rules.bat and choose to Run as Administrator.
You may see a warning Saying “Windows protected your PC,” because Windows doesn’t like unknown sources. Allow it by clicking More Info and Run Anyway. Then you will see a prompt asking you to let Windows Command Processor to make changes to your device, click Yes.
Firewall rules should have been successfully added. Press any key to close the window.
Note: If you decide to uninstall and want to undo this, run remove_firewall_rules.bat as administrator.
Push the ALVR APK to the Oculus Quest
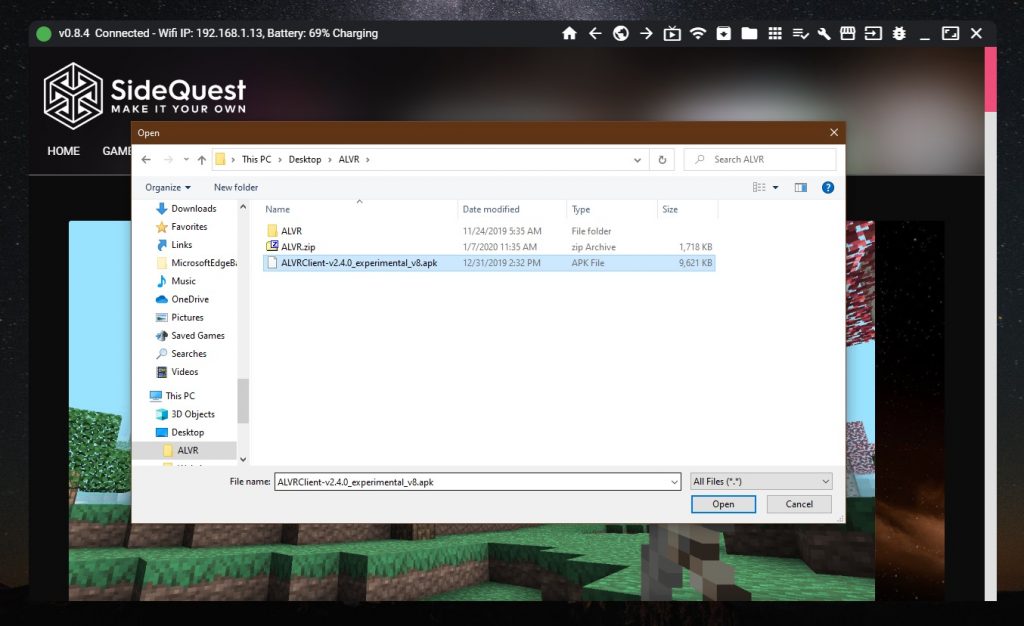
Open SideQuest, if you don’t already have SideQuest installed on your PC follow the instructions here. Choose Install APK file from folder.

Select the ALVRClient-v2.4.0_experimental_v8.apk (or newer) file you downloaded, and click Open. That’s all we need to do here, so if it transferred the file successfully you can exit SideQuest.
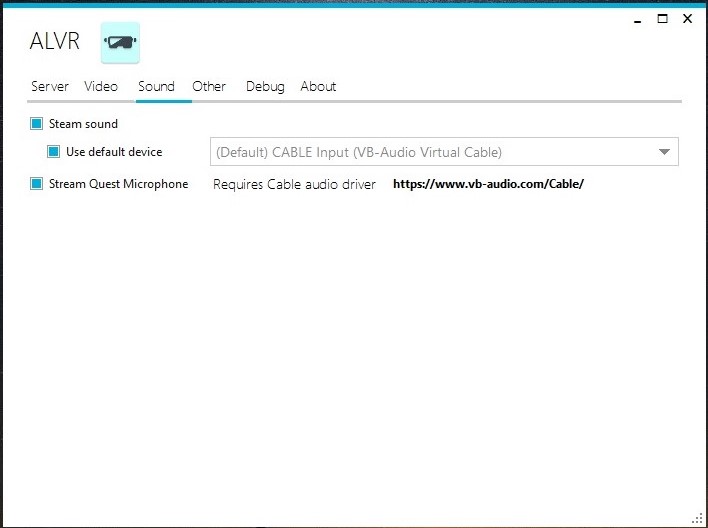
Audio
Audio Steaming from PC to Quest requires software that creates a Virtual Cable. You can download the VB-CABLE Virtual Audio Device program from https://www.vb-audio.com/Cable/ (maybe only necessary for using the Quest microphone)
Launching the Server
Open ALVR on PC
Open ALVR.exe in the folder where you extracted ALVR.zip
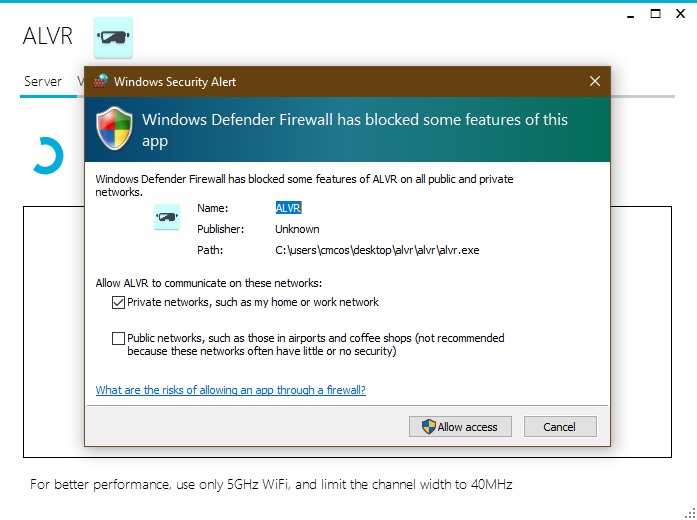
You may see an alert about firewall settings the first time you run ALVR. Click Allow access.
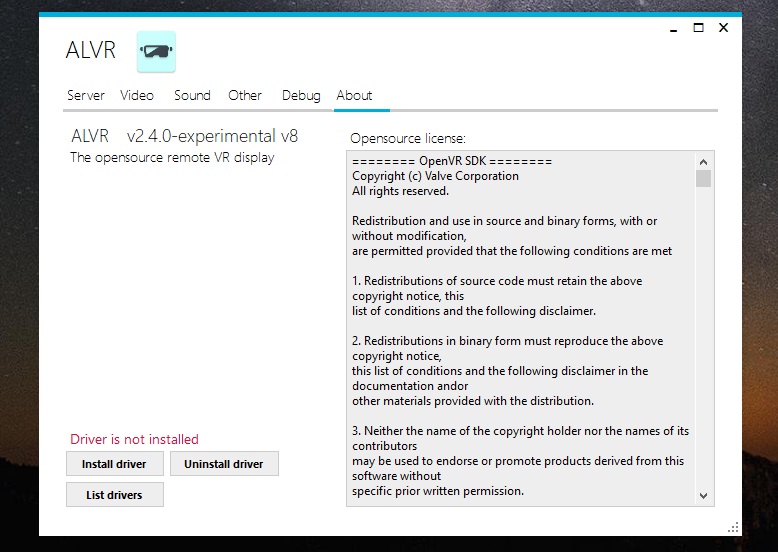
Make sure ALVR driver is installed in the by checking the About tab. if it isn’t, then click Install driver. It will copy the necessary file to Steam VR.
On the Quest
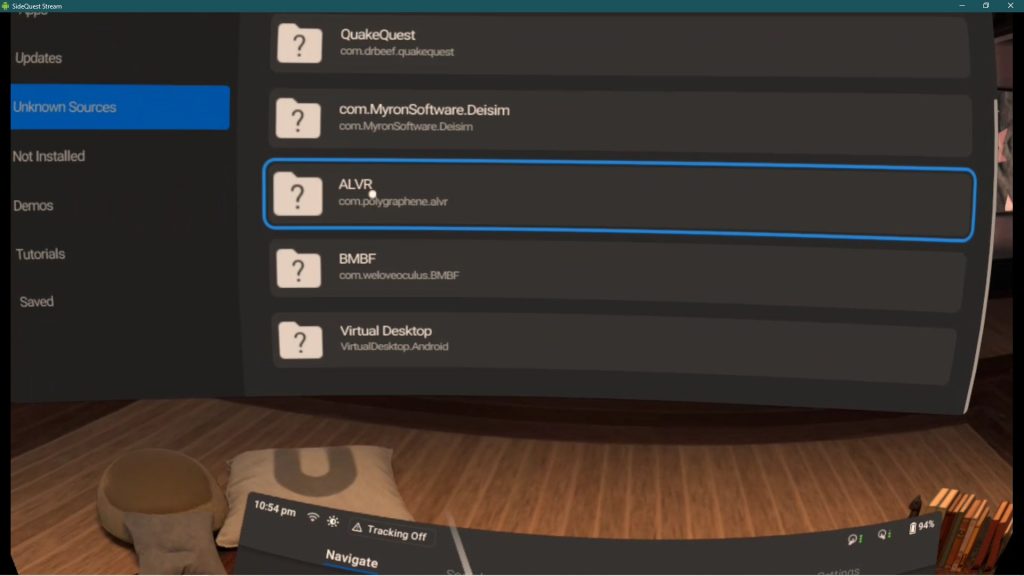
In your headset, open the ALVR app. It’s in the Unknown Sources tab of your Library. Navigate > Library > Unknown Sources > ALVR
When you start the ALVR server on the headset you’ll see this screen telling you to “Press CONNECT button on ALVR server.”

On your PC, You’ll hopefully see that it found your device, lists the IP, and now has a button you can click to connect. Click it.
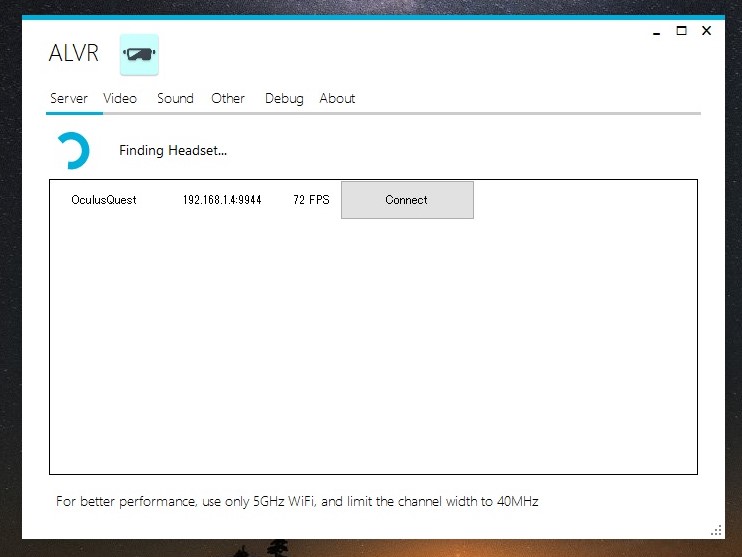
Once connected you can save the IP and enable the option to Auto connect next time you run ALVR.
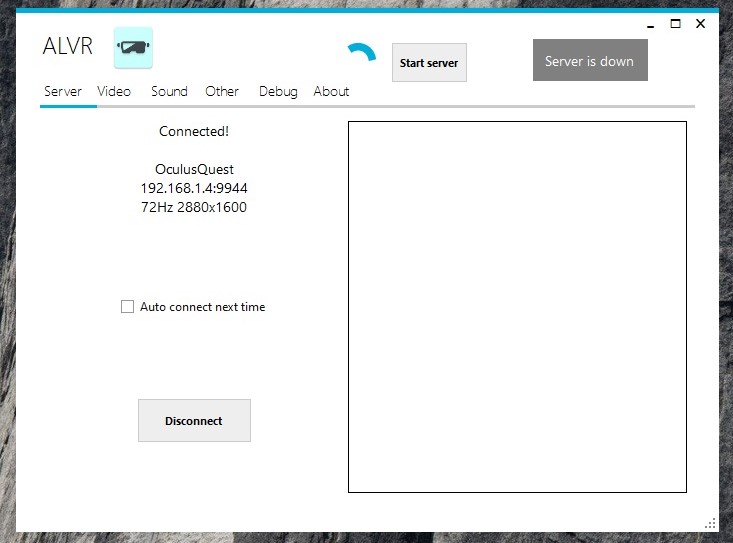
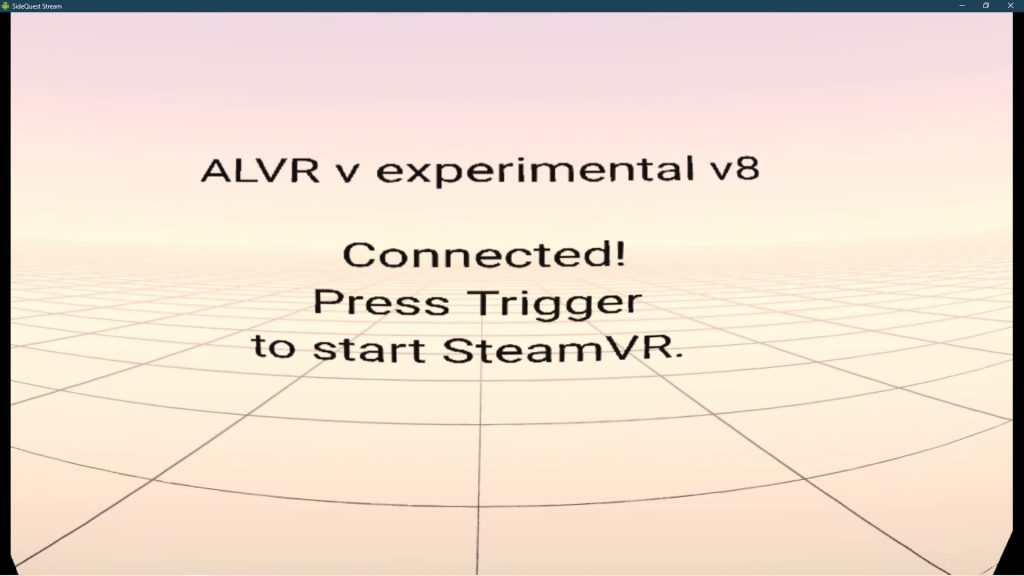
Now the screen in the headset says “Press trigger to start SteamVR.” It will open Steam VR and run you through instructions for Room-scale setup. (Clicking Start server on the PC server app will also start the server and Steam VR.)
Launch Steam VR games.
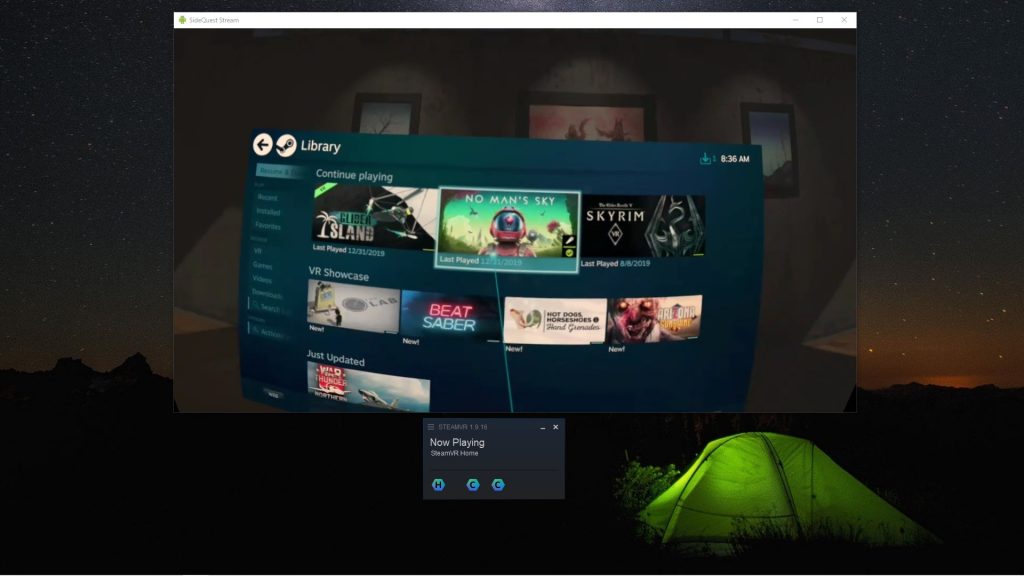
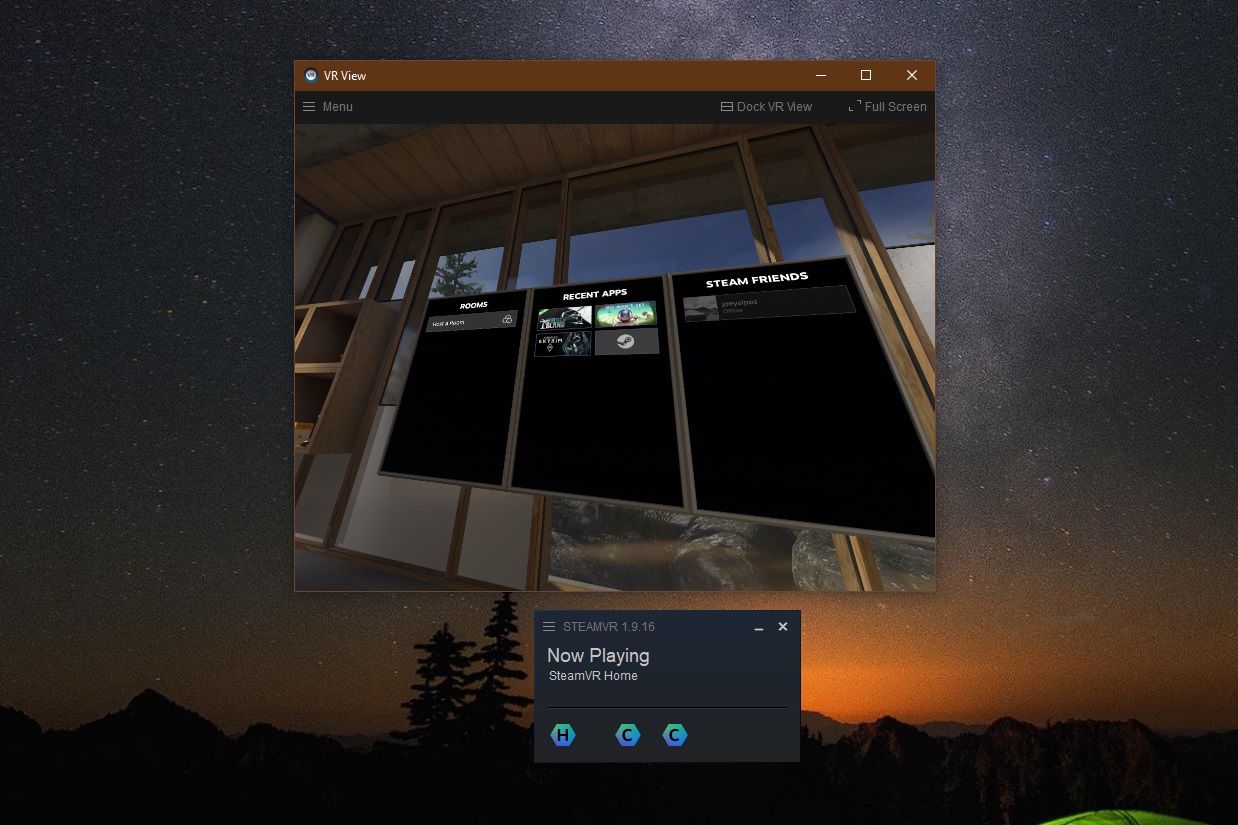
Once the server is launched and you’ve followed Steam VR’s instructions, you can launch your Steam VR games right in the headset. In the Steam VR Home, theres a Recent Apps board on the wall.
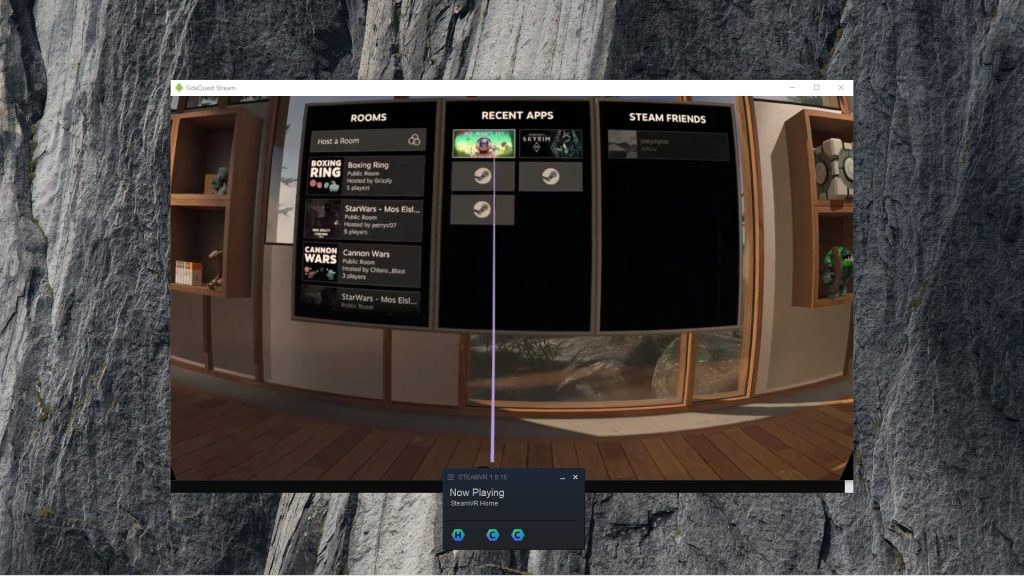
To see your full Steam VR library press the Menu button on the left touch controller, and click select Steam Library.

Then you’ll see and be able to choose from all your Steam VR games.